Start from the event you're planning
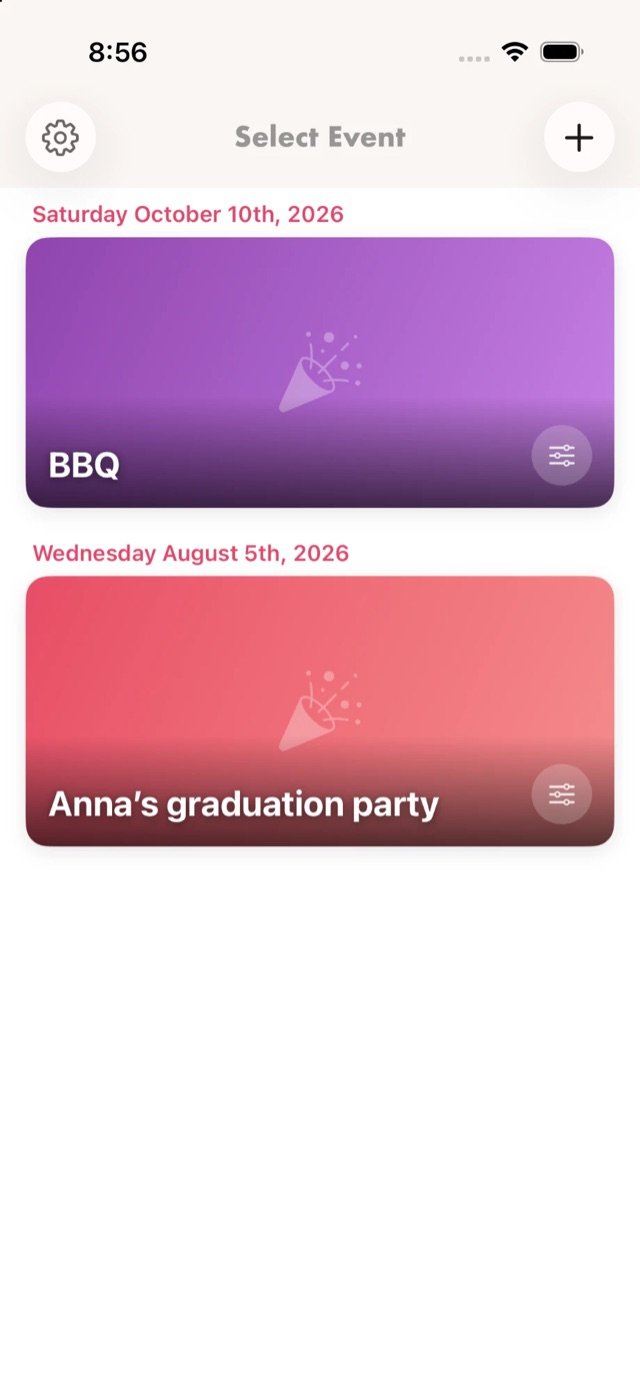
Your events are listed on the Select Event screen, grouped by date. Tap the sliders button in the corner of an event card to open its settings — that's where everything about the invitation lives.
- Tap + at the top right to create a new event first
- Each event keeps its own guests, budget, timeline and invitation
Set the details guests will see first
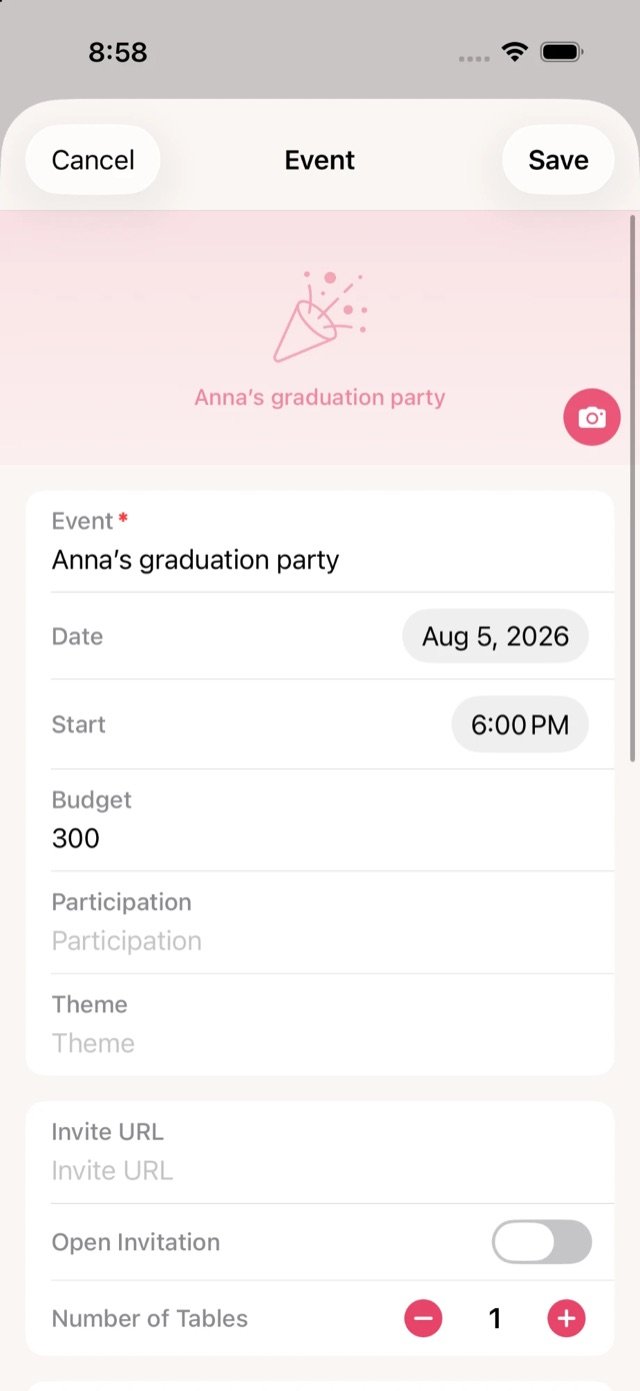
The event name, date and start time at the top of this screen are exactly what appears on the invitation, so get these right before you send.
- Tap Date and Start to pick the day and hour
- Tap the camera button on the header to add a cover photo
- Tap Save when you're done — nothing is sent yet
Add the address and a personal note
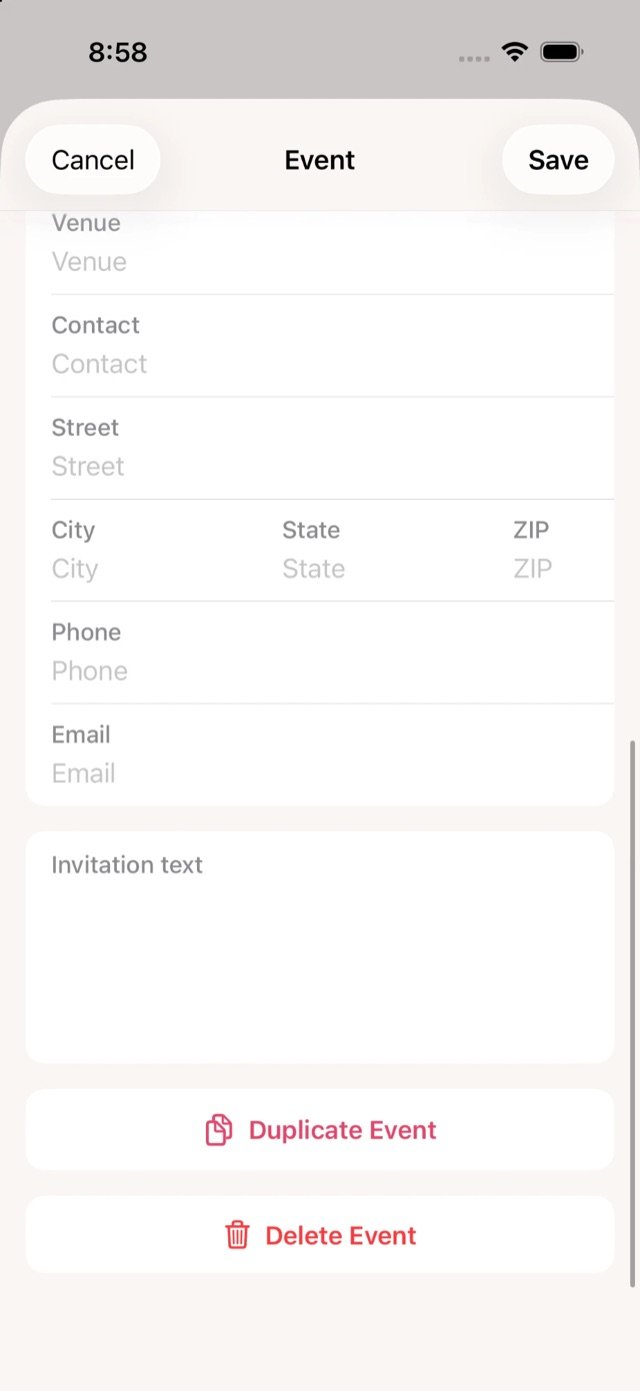
Scroll down the same screen. The venue and address fields become the "Where" on your invitation, and Invitation text becomes the Message from the host — the part that makes it feel like you.
- Venue, Street, City, State, ZIP — these become the “Where” on the invitation
- Contact, Phone, Email — your contact details, stored with the event
- Invitation text — your welcome message, dress code, parking tips
Find it from the guest list
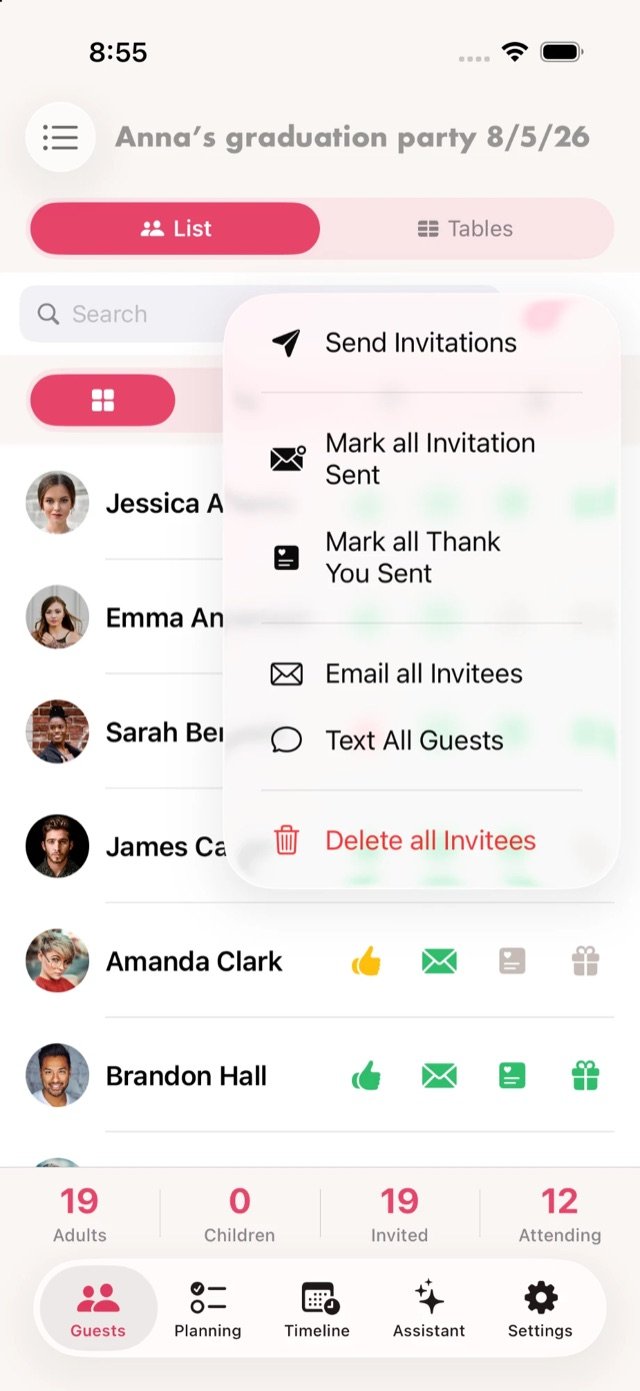
Open your event, go to the Guests tab, then tap the “…” button at the top right and choose Send Invitations. That opens your invitation so you can see exactly what guests will get.
Nothing has gone out yet — this is your preview.
- The same menu has Email all Invitees and Text All Guests for plain messages
Guests → “…” menu
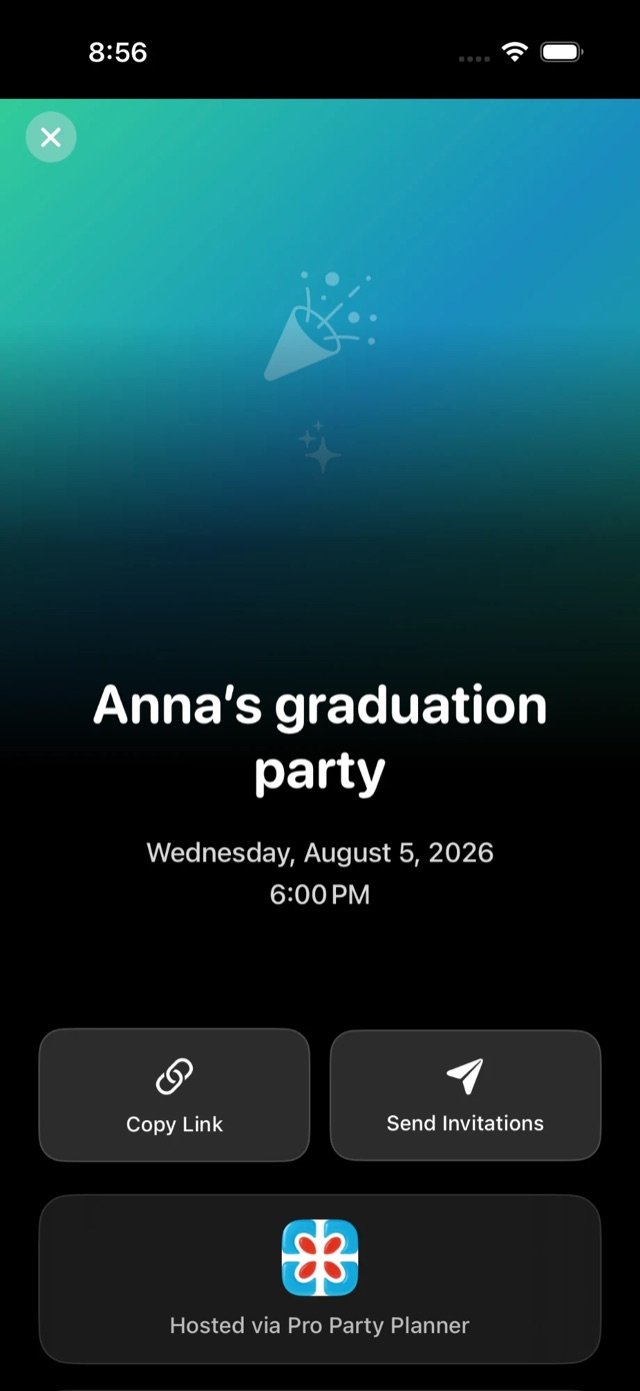
Your invitation opens
Send, or copy the link
On the invitation itself, tap Send Invitations to deliver it to your guest list — you'll get an “Invitation has been sent” confirmation. Or tap Copy Link to grab the URL and share it yourself in a group chat, an email or a story.
Notice the difference a cover photo makes. The preview above had none; this one uses the photo added back in step 2.
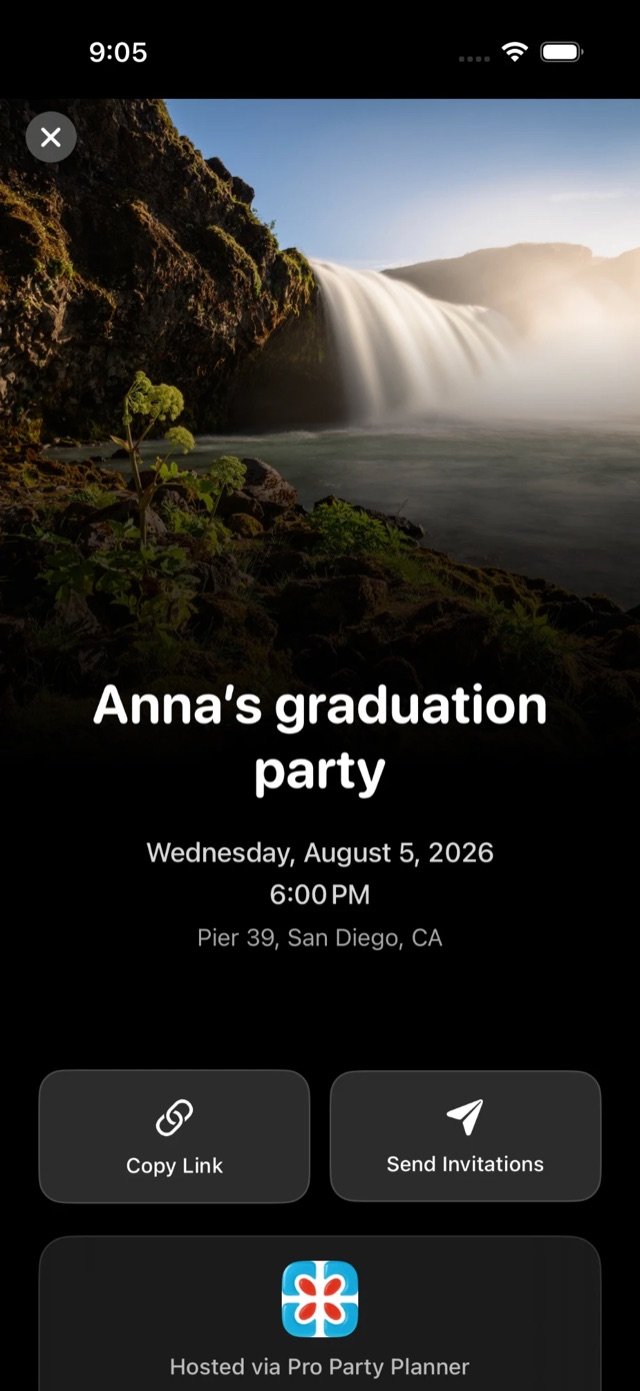
With a cover photo
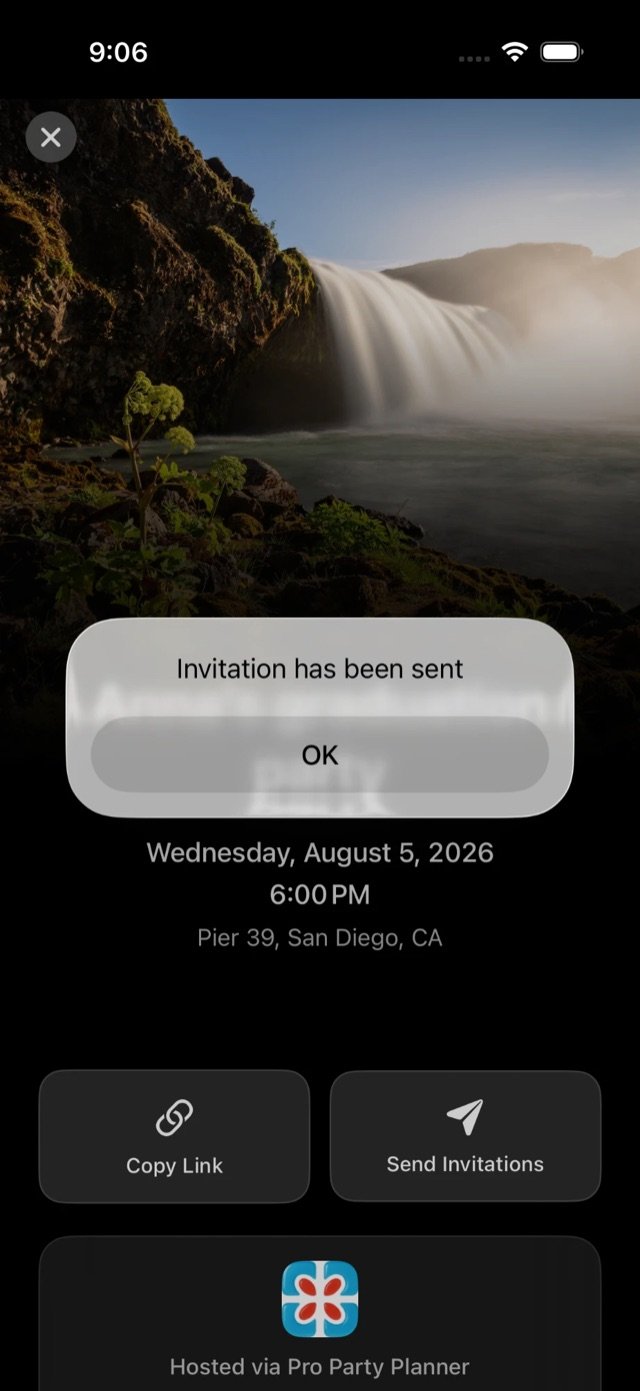
Confirmation
What your guests open
The link opens a full invitation page in any browser — iPhone, Android or computer. No app, no account.
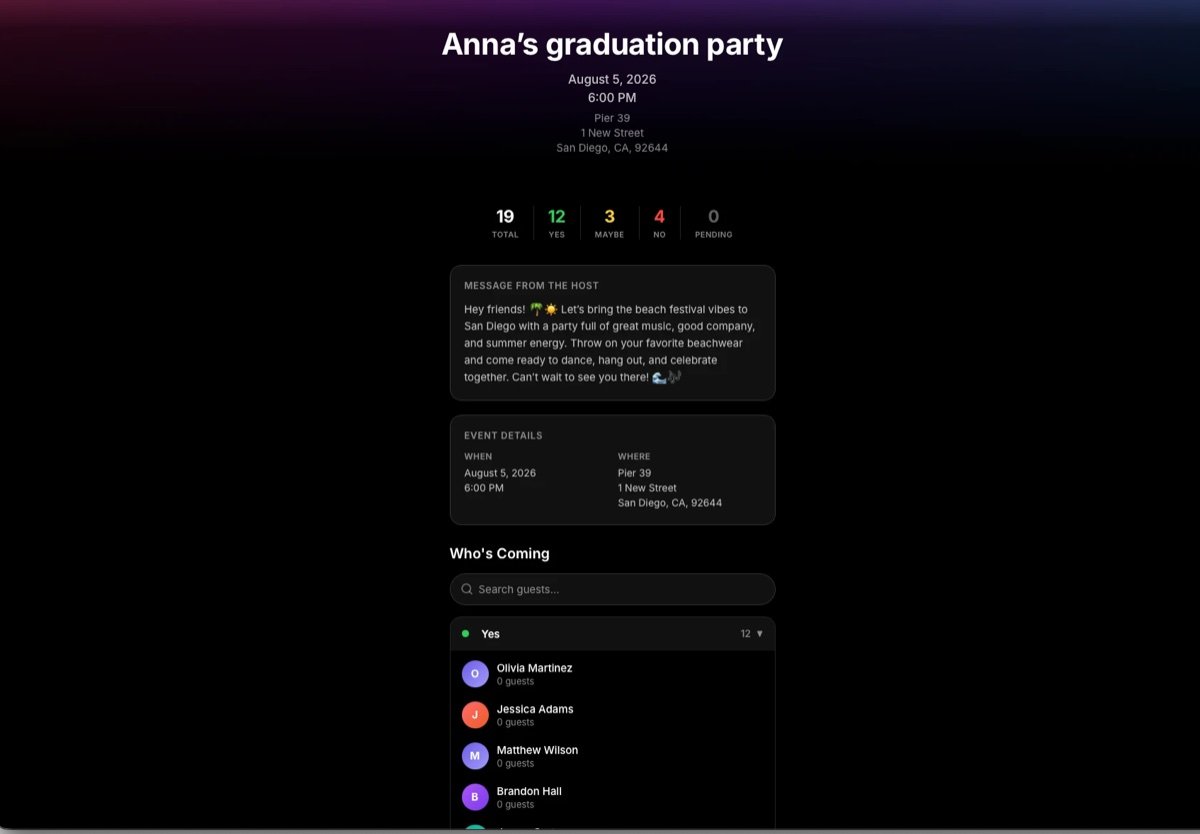
- ✓ Live RSVP tallies — total, yes, maybe, no and still pending, updated as replies come in
- ✓ Message from the host — the invitation text you wrote in step 3
- ✓ Event details — when and where, with the full address
- ✓ Who's Coming — a searchable list of guests grouped by their answer
Good to know: the “Who's Coming” list is visible to anyone who opens the invitation, so your guests can see each other's names and replies. Keep that in mind for surprise parties — or for guest lists you'd rather keep private.
Track every guest at a glance
Back in the Guests tab, each person has four markers you can tap, and the running totals sit along the bottom.
Read the list in one glance
Use the filter chips under the search bar to jump straight to everyone who said yes, no or maybe. The bar at the bottom keeps a live count of Adults, Children, Invited and Attending.
Switch to Tables at the top to start seating the guests who've confirmed.
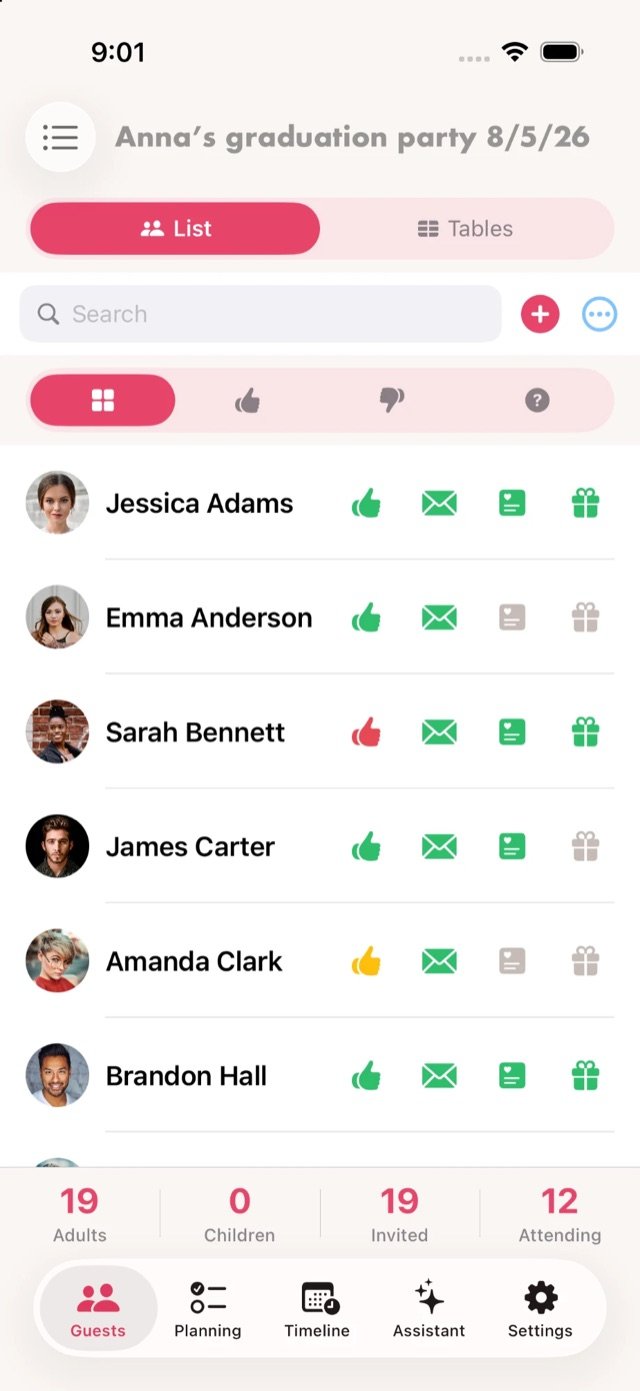
RSVP status
Green for yes, amber for maybe, red for no. Tap to set it yourself when someone replies by phone or in person.
Invitation sent
Tap it as you invite people, or use Mark all Invitation Sent to set the whole list at once.
Thank-you sent
Mark each thank-you note as it goes out after the party.
Gift
Keep track of which guests brought a gift — handy when writing those thank-you notes.
Bulk shortcuts: the “…” menu also has Mark all Invitation Sent and Mark all Thank You Sent — useful when you've invited people outside the app and just need the list to match reality.
Ready to send your first invitation?
Pro Party Planner is free on the App Store — CNET's best all-in-one party planner.
 CNET Award Winner · Free download · iPhone & iPad